Print design was a new experience for me. Here are some of the key takeaways from my recent experiences.
Tools
The tool of choice for print design is Adobe Illustrator. I tried numerous other options including source tools and online tools. No other tool gave me the ability to make changes quickly and reliably that Adobe Illustrator.

Color
Most web design for the web uses RBG (red, blue, green) color codes because colors are created by light. Most print design uses CMYK (cyan, magenta, yellow, key/black) color codes because colors are created by ink. Here’s more details on the differences
Bleed
A bleed is the area beyond the expected print area. The reason you design with a bleed is that printing errors are inevitable. There’s probably a +/-2% leeway for printers. Because of this, you want to leave room for error.
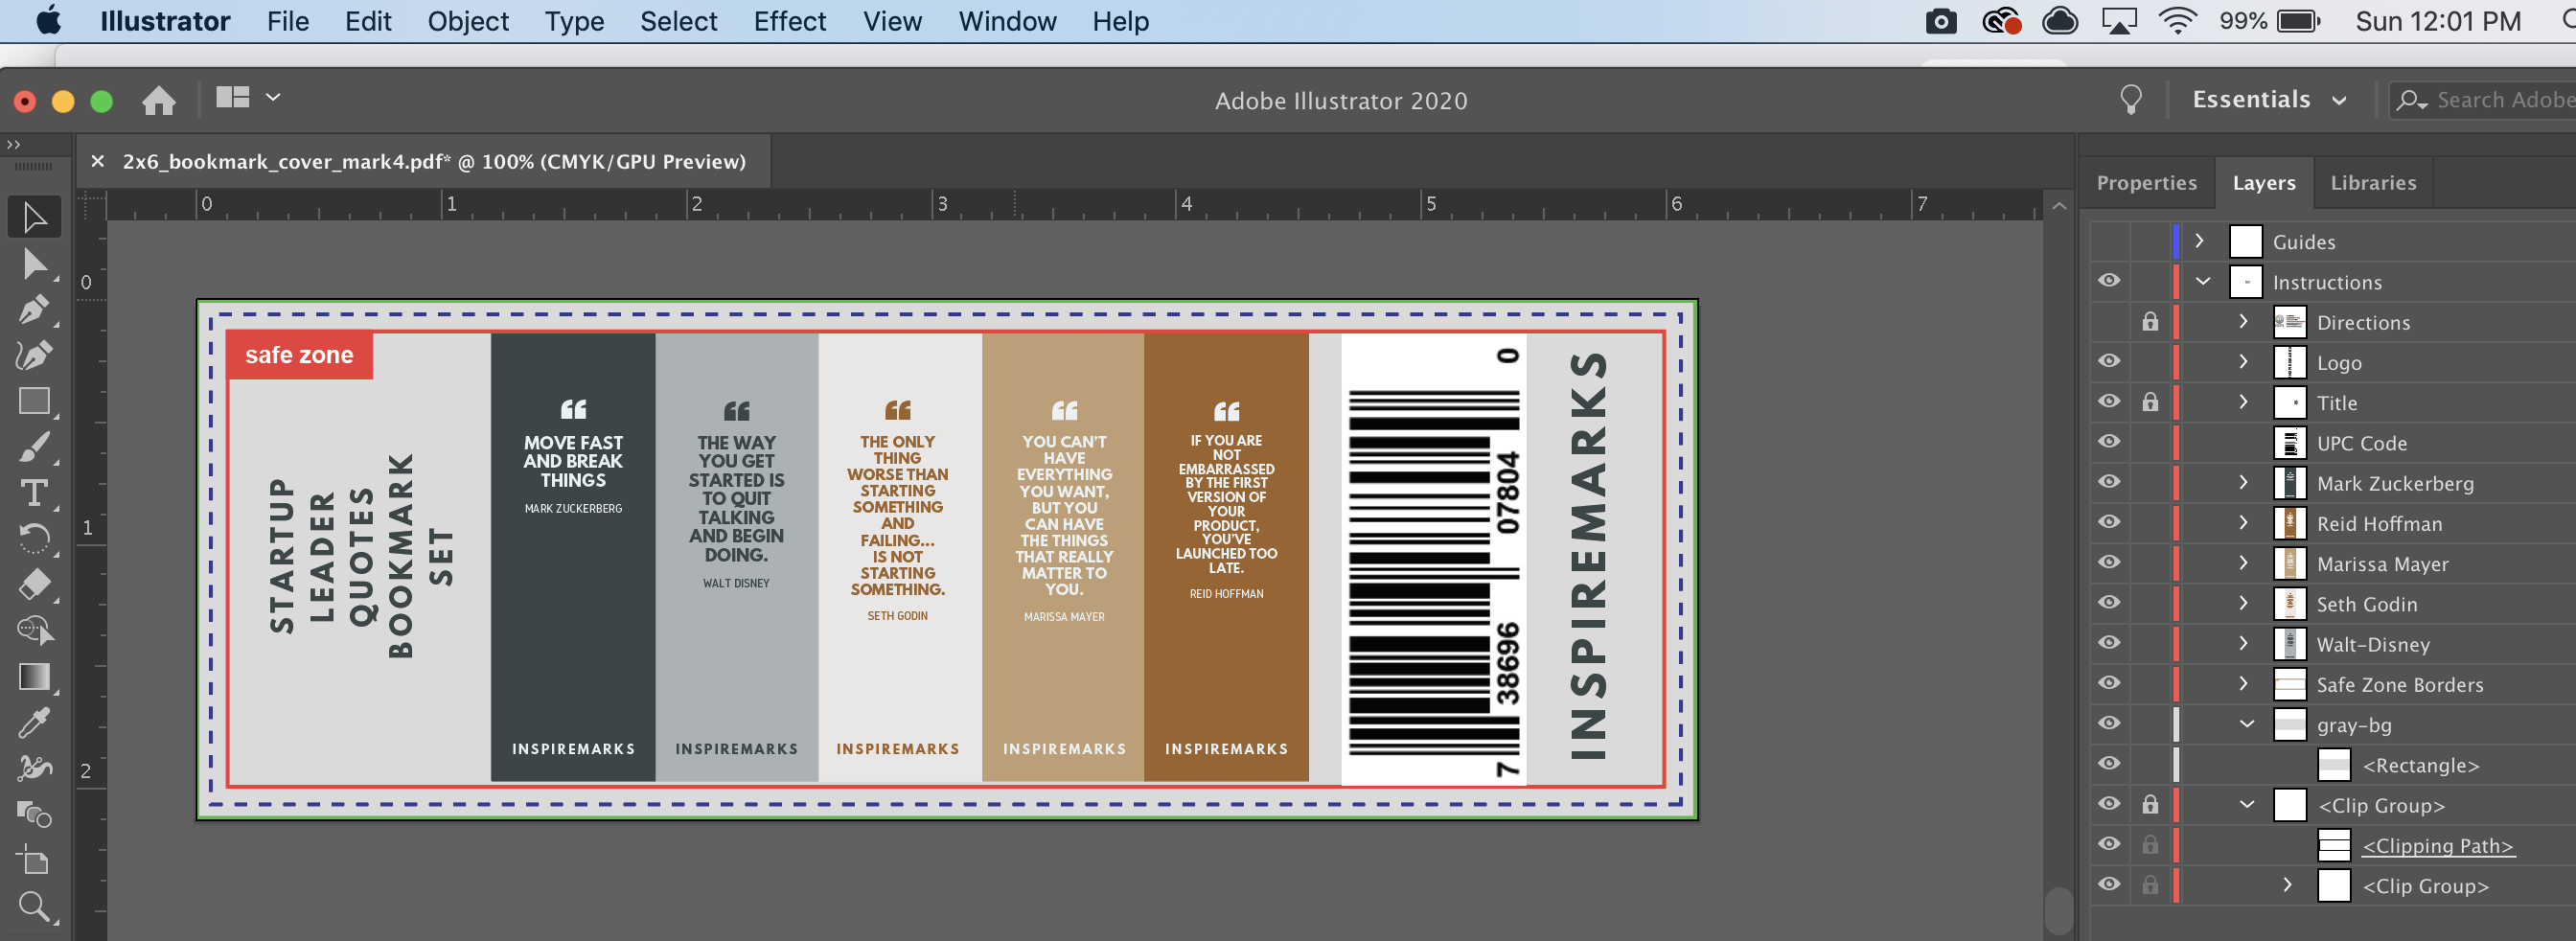
Overnightprints.com, our printing partner at Inspiremarks sent me this a
Adobe Illustrator file to help with designing bleeds. Overnight Prints suggests using a full bleed. In the image below, the red line is the safe zone, the dotted line is where the bleed extends to. For for a full bleed, they suggest continuing the design throughout the entire file past the dotted line.

Here’s a screenshot of more information about the common mistake of not leaving a bleed on the overnight prints common mistakes page.

DPI is Critical
DPI, or Dots Per Inch is a critical setting for print quality. Print shops expect at least 300 DPI. You need to be careful because many programs default to 72 DPI. Make sure you double check your settings before exporting files to PDF.
PDF Format

Send files in PDF format. It’s the best format to send completed designs because it does not rely on the end user having the correct fonts installed on their machines. If you send files in other formats, you risk the end product being slightly different than you had intended. This is usually never the desired result.